

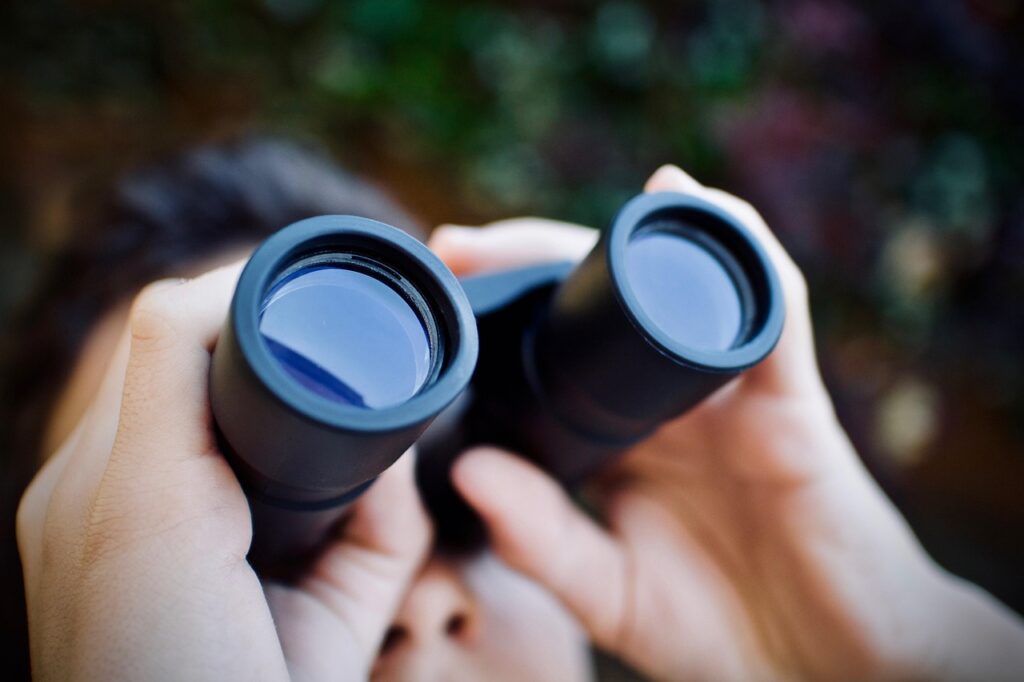
 Unlike telescopes, which are often designed for high magnification and narrow fields of view, binoculars provide a much wider perspective. This makes them ideal for observing large star clusters, the Milky Way, bright nebulae like Orion, or simply sweeping across dark skies to explore what’s out there. The experience of using both eyes gives a natural, immersive feel and often makes it easier to spot faint objects.
Binoculars are not intended for detailed views of planets or other Solar System targets — for that, a telescope is far more suitable. That said, you can spot some of the brighter planets like Jupiter and Venus with binoculars, and even glimpse the Galilean moons as tiny pinpricks around Jupiter. The Moon, of course, is a beautiful binocular target with plenty of visible detail.
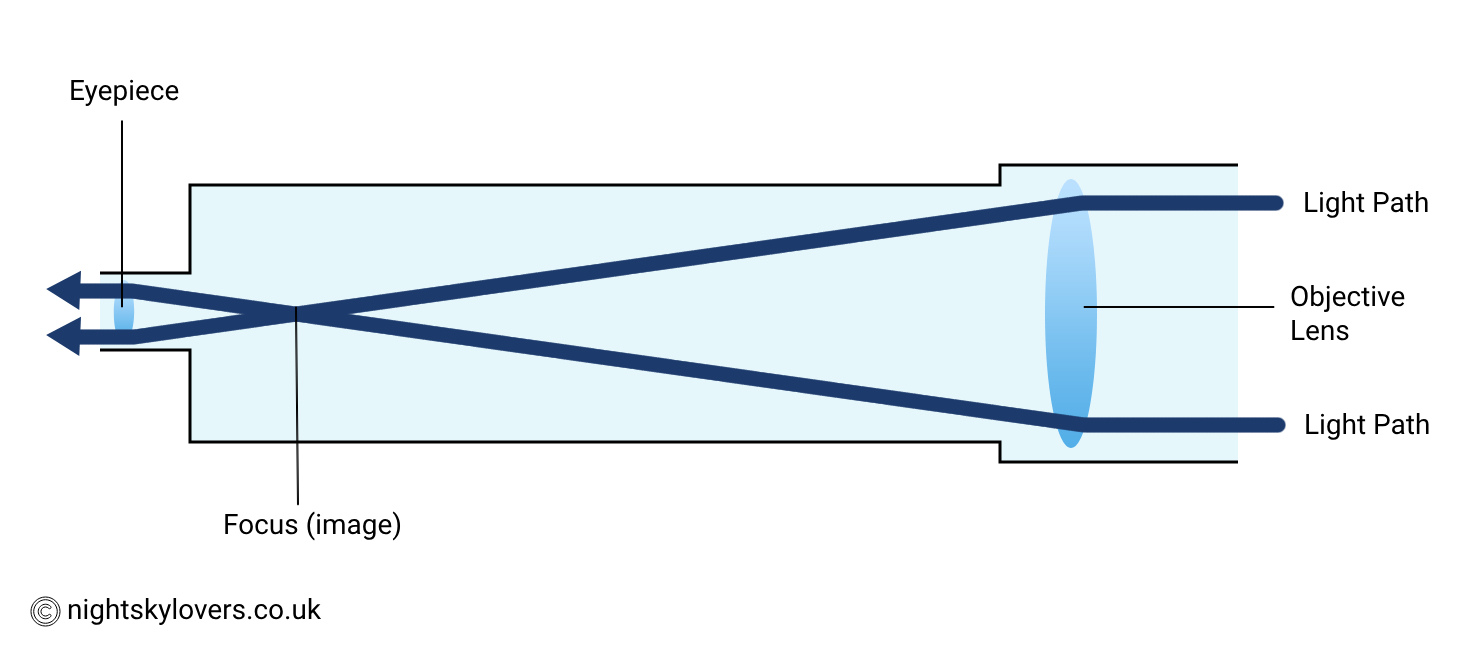
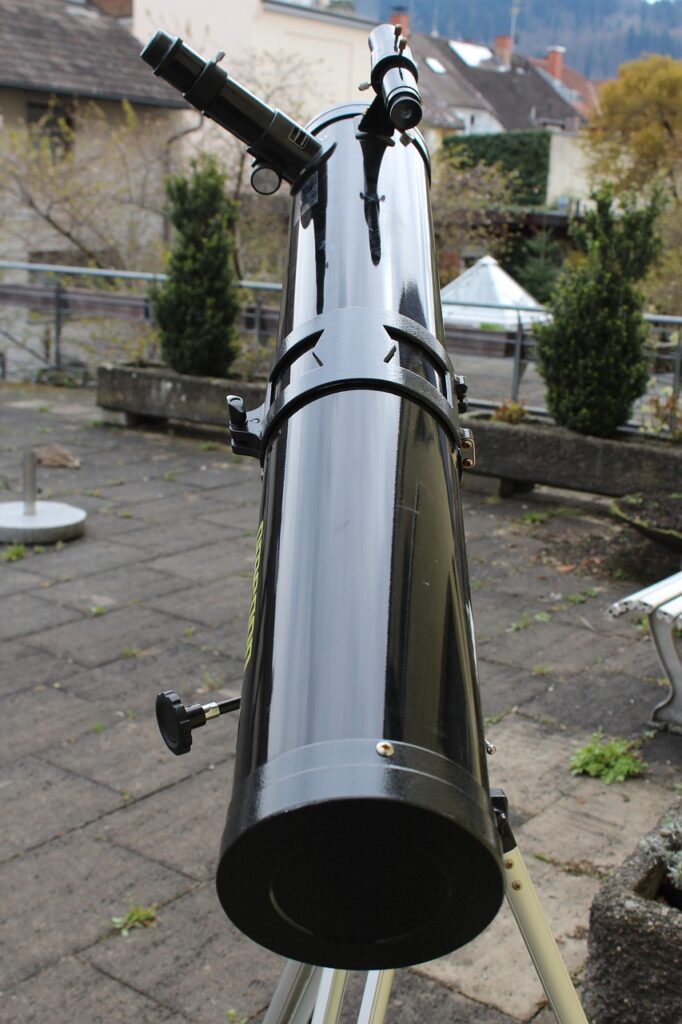
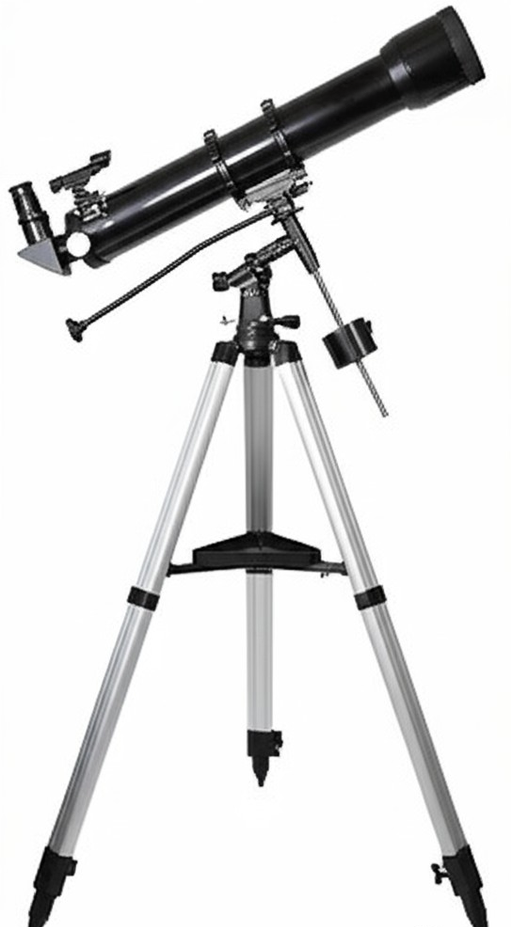 Refractor telescopes use lenses to bend (or refract) light to a focal point. They’re typically long and slender with the eyepiece at the back. This classic design is known for delivering crisp, high-contrast views, particularly of the Moon, planets, and double stars.
Refractors are available in a range of apertures, but larger models can become quite long and heavy, which may limit portability and increase cost. Smaller aperture refractors, however, are excellent for quick setup and sharp planetary viewing.
Advantages of Refractors:
Excellent image contrast and clarity—ideal for lunar and planetary observing.
Sealed optical tube keeps out dust and moisture, making it low-maintenance.
No need for collimation or frequent alignment.
Disadvantages of Refractors:
Chromatic aberration (colour fringing) may be visible, especially in budget models.
Larger apertures significantly increase size and cost.
Less suitable for deep-sky viewing due to smaller affordable apertures.
Best suited for: Beginners, planetary observers, and those seeking simplicity with smaller apertures (typically under 120mm).
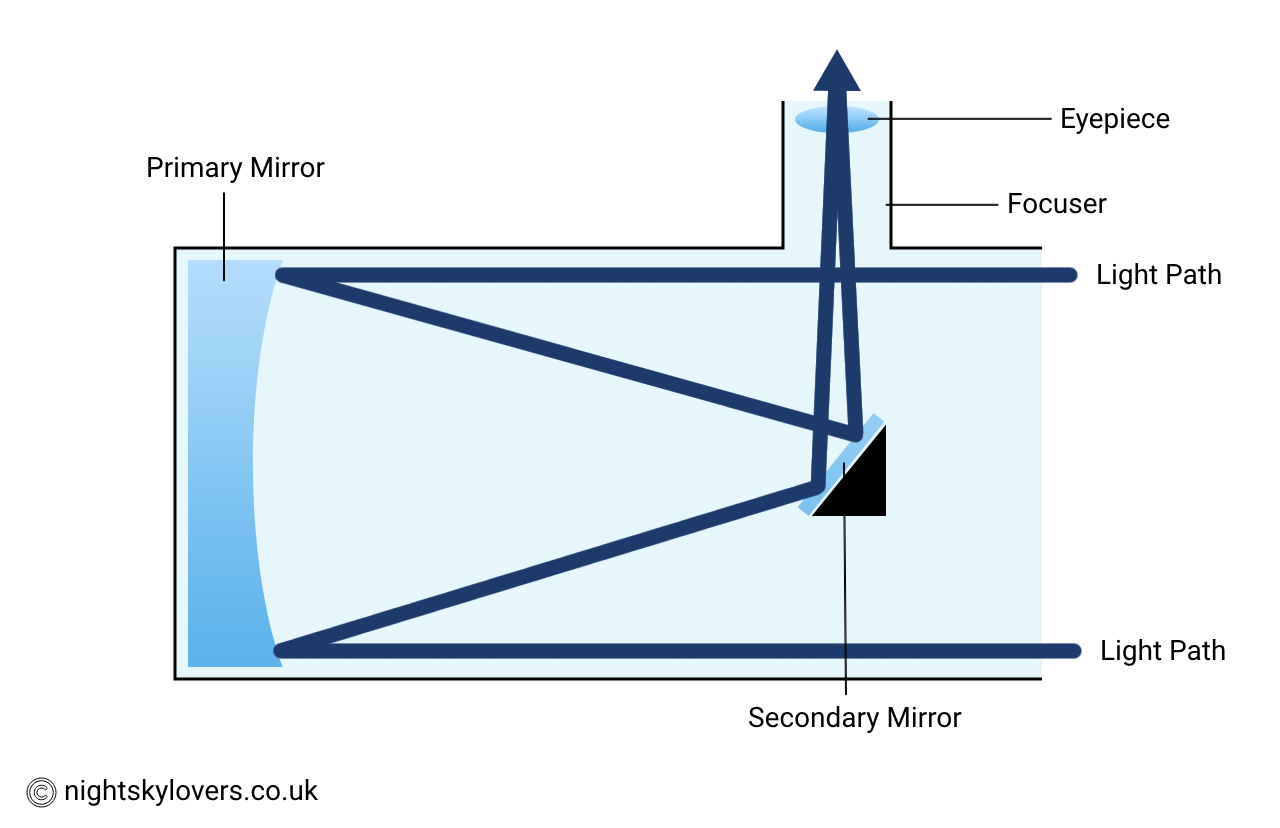
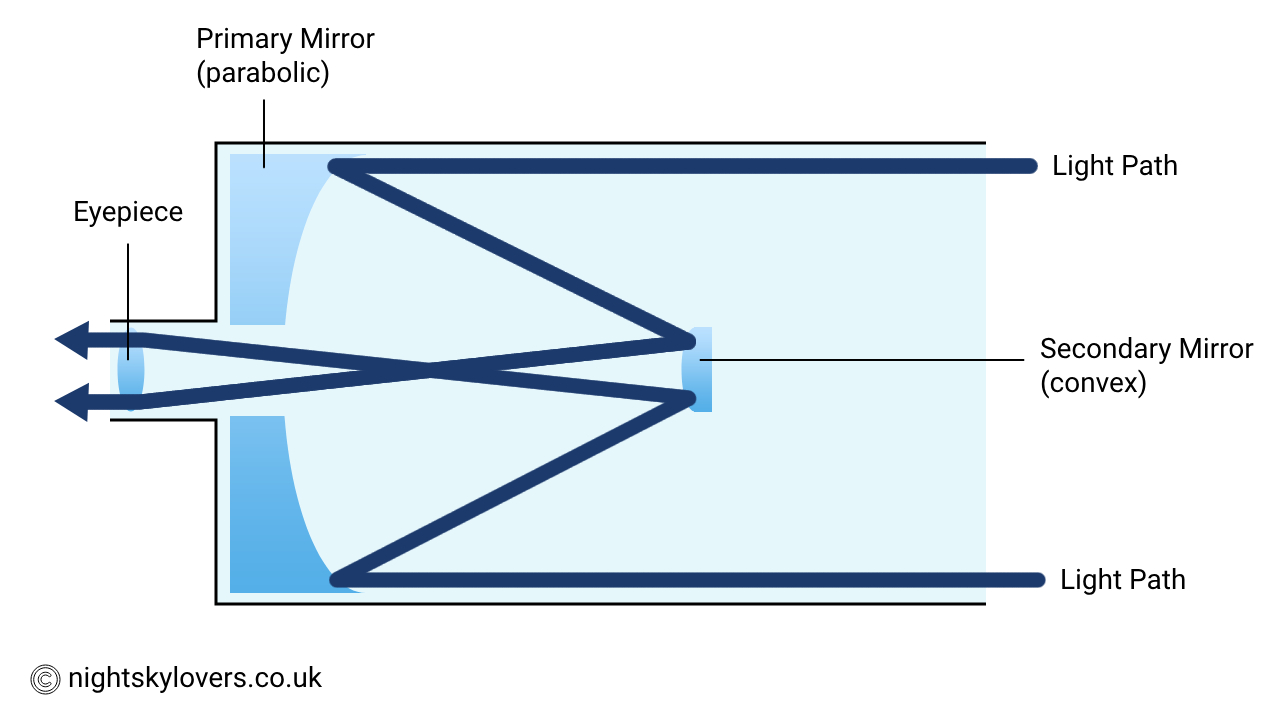
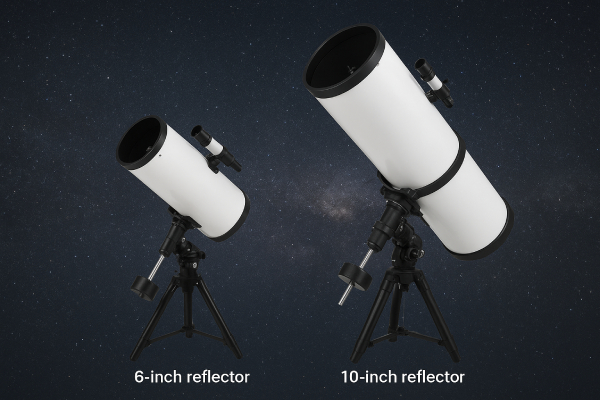
 Reflector telescopes use mirrors instead of lenses to gather and focus light. The most popular type is the Newtonian reflector. These designs offer large apertures at affordable prices, making them particularly well-suited for deep-sky astronomy.
Because reflectors are easier and cheaper to manufacture in larger sizes, they are often the best choice for those seeking a large aperture telescope without breaking the bank. A bigger mirror means more light and better visibility of faint celestial objects.
Advantages of Reflectors:
Cost-effective way to get a large aperture—perfect for observing galaxies and nebulae.
No chromatic aberration since light is focused using mirrors.
Shorter tube length relative to aperture size makes storage easier.
Disadvantages of Reflectors:
Open-tube design can lead to dust buildup and requires occasional cleaning.
Requires regular collimation (alignment of mirrors).
Slightly reduced contrast due to the secondary mirror obstruction.
Best suited for: Deep-sky observers, hobbyists looking for large aperture (150mm+), and budget-conscious stargazers.
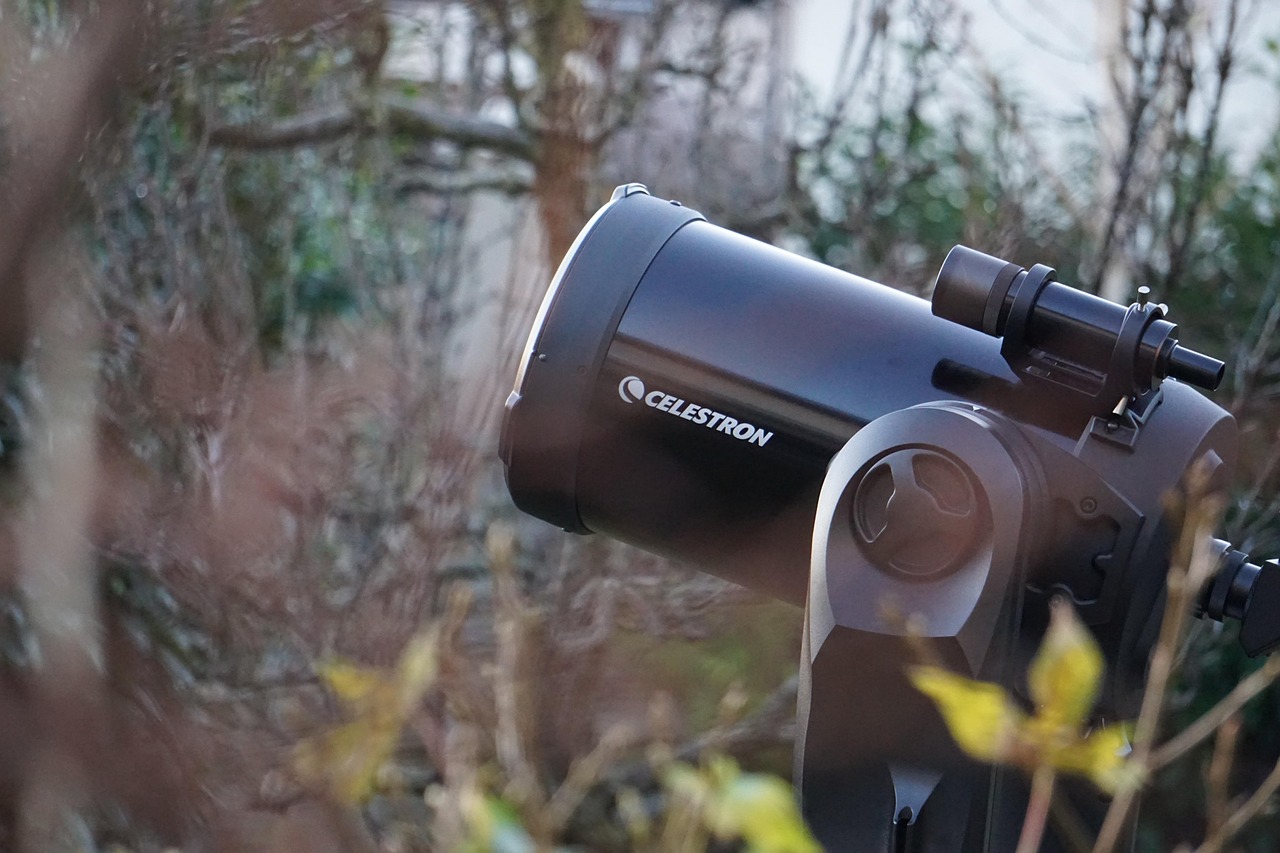 Cassegrain telescopes combine both mirrors and lenses in a folded optical path, resulting in compact yet powerful instruments. Popular subtypes include Schmidt-Cassegrain and Maksutov-Cassegrain designs.
These telescopes are known for offering large apertures in compact, portable tubes. For those with limited storage space or who want a scope suitable for both visual observing and astrophotography, Cassegrains are an excellent all-round choice.
Advantages of Cassegrain Telescopes:
High aperture-to-size ratio—large light-gathering power in a small footprint.
Closed-tube design protects optics and ensures stable collimation.
Very versatile: great for planets, deep-sky, and imaging.
Disadvantages of Cassegrain Telescopes:
More expensive per inch of aperture than reflectors.
Longer cool-down times, especially in Maksutov models.
Narrower field of view may limit wide-field observing.
Best suited for: Serious amateurs, astrophotographers, and anyone needing a powerful yet compact scope with apertures typically ranging from 90mm to 300mm.
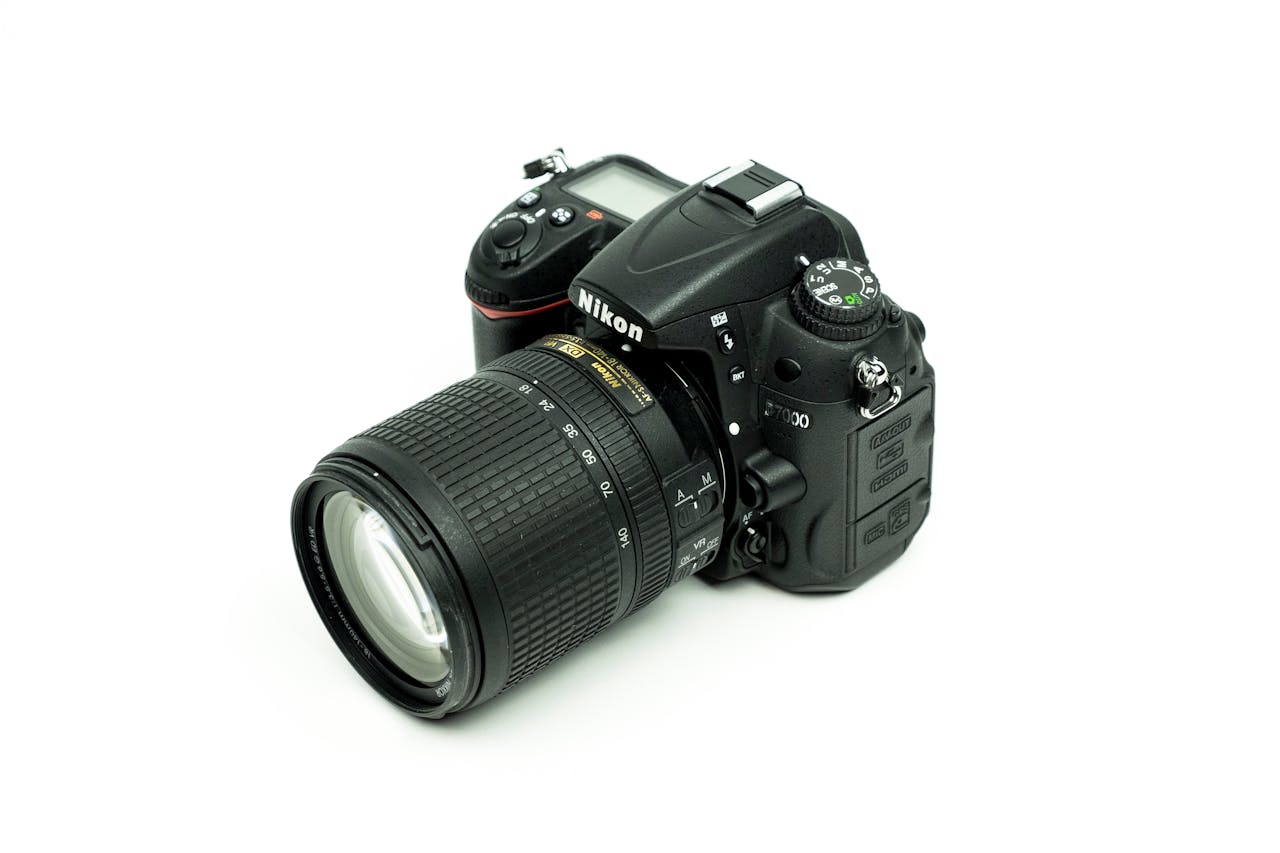
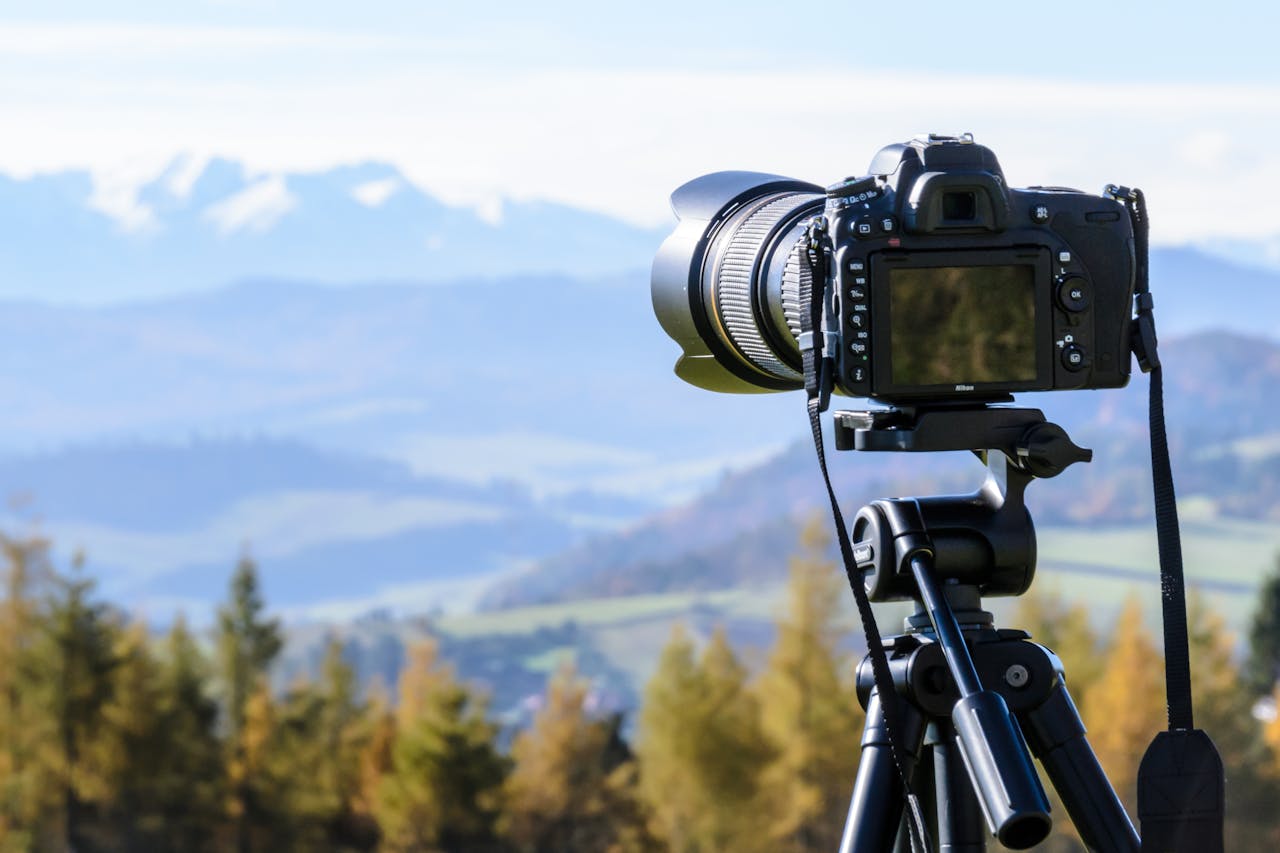 Digital Single-Lens Reflex (DSLR) cameras are a popular entry point for astrophotography. They are versatile, widely available, and can be used both for everyday photography and stargazing.
Benefits of DSLRs:
Large sensors capture wide-field images of the night sky.
Interchangeable lenses for flexibility (e.g. wide-angle for Milky Way, telephoto for deep-sky).
Affordable and widely supported with accessories.
Can shoot in RAW format, preserving detail for editing.
Best for: Beginners, wide-field Milky Way shots, star trails, and general all-round use.
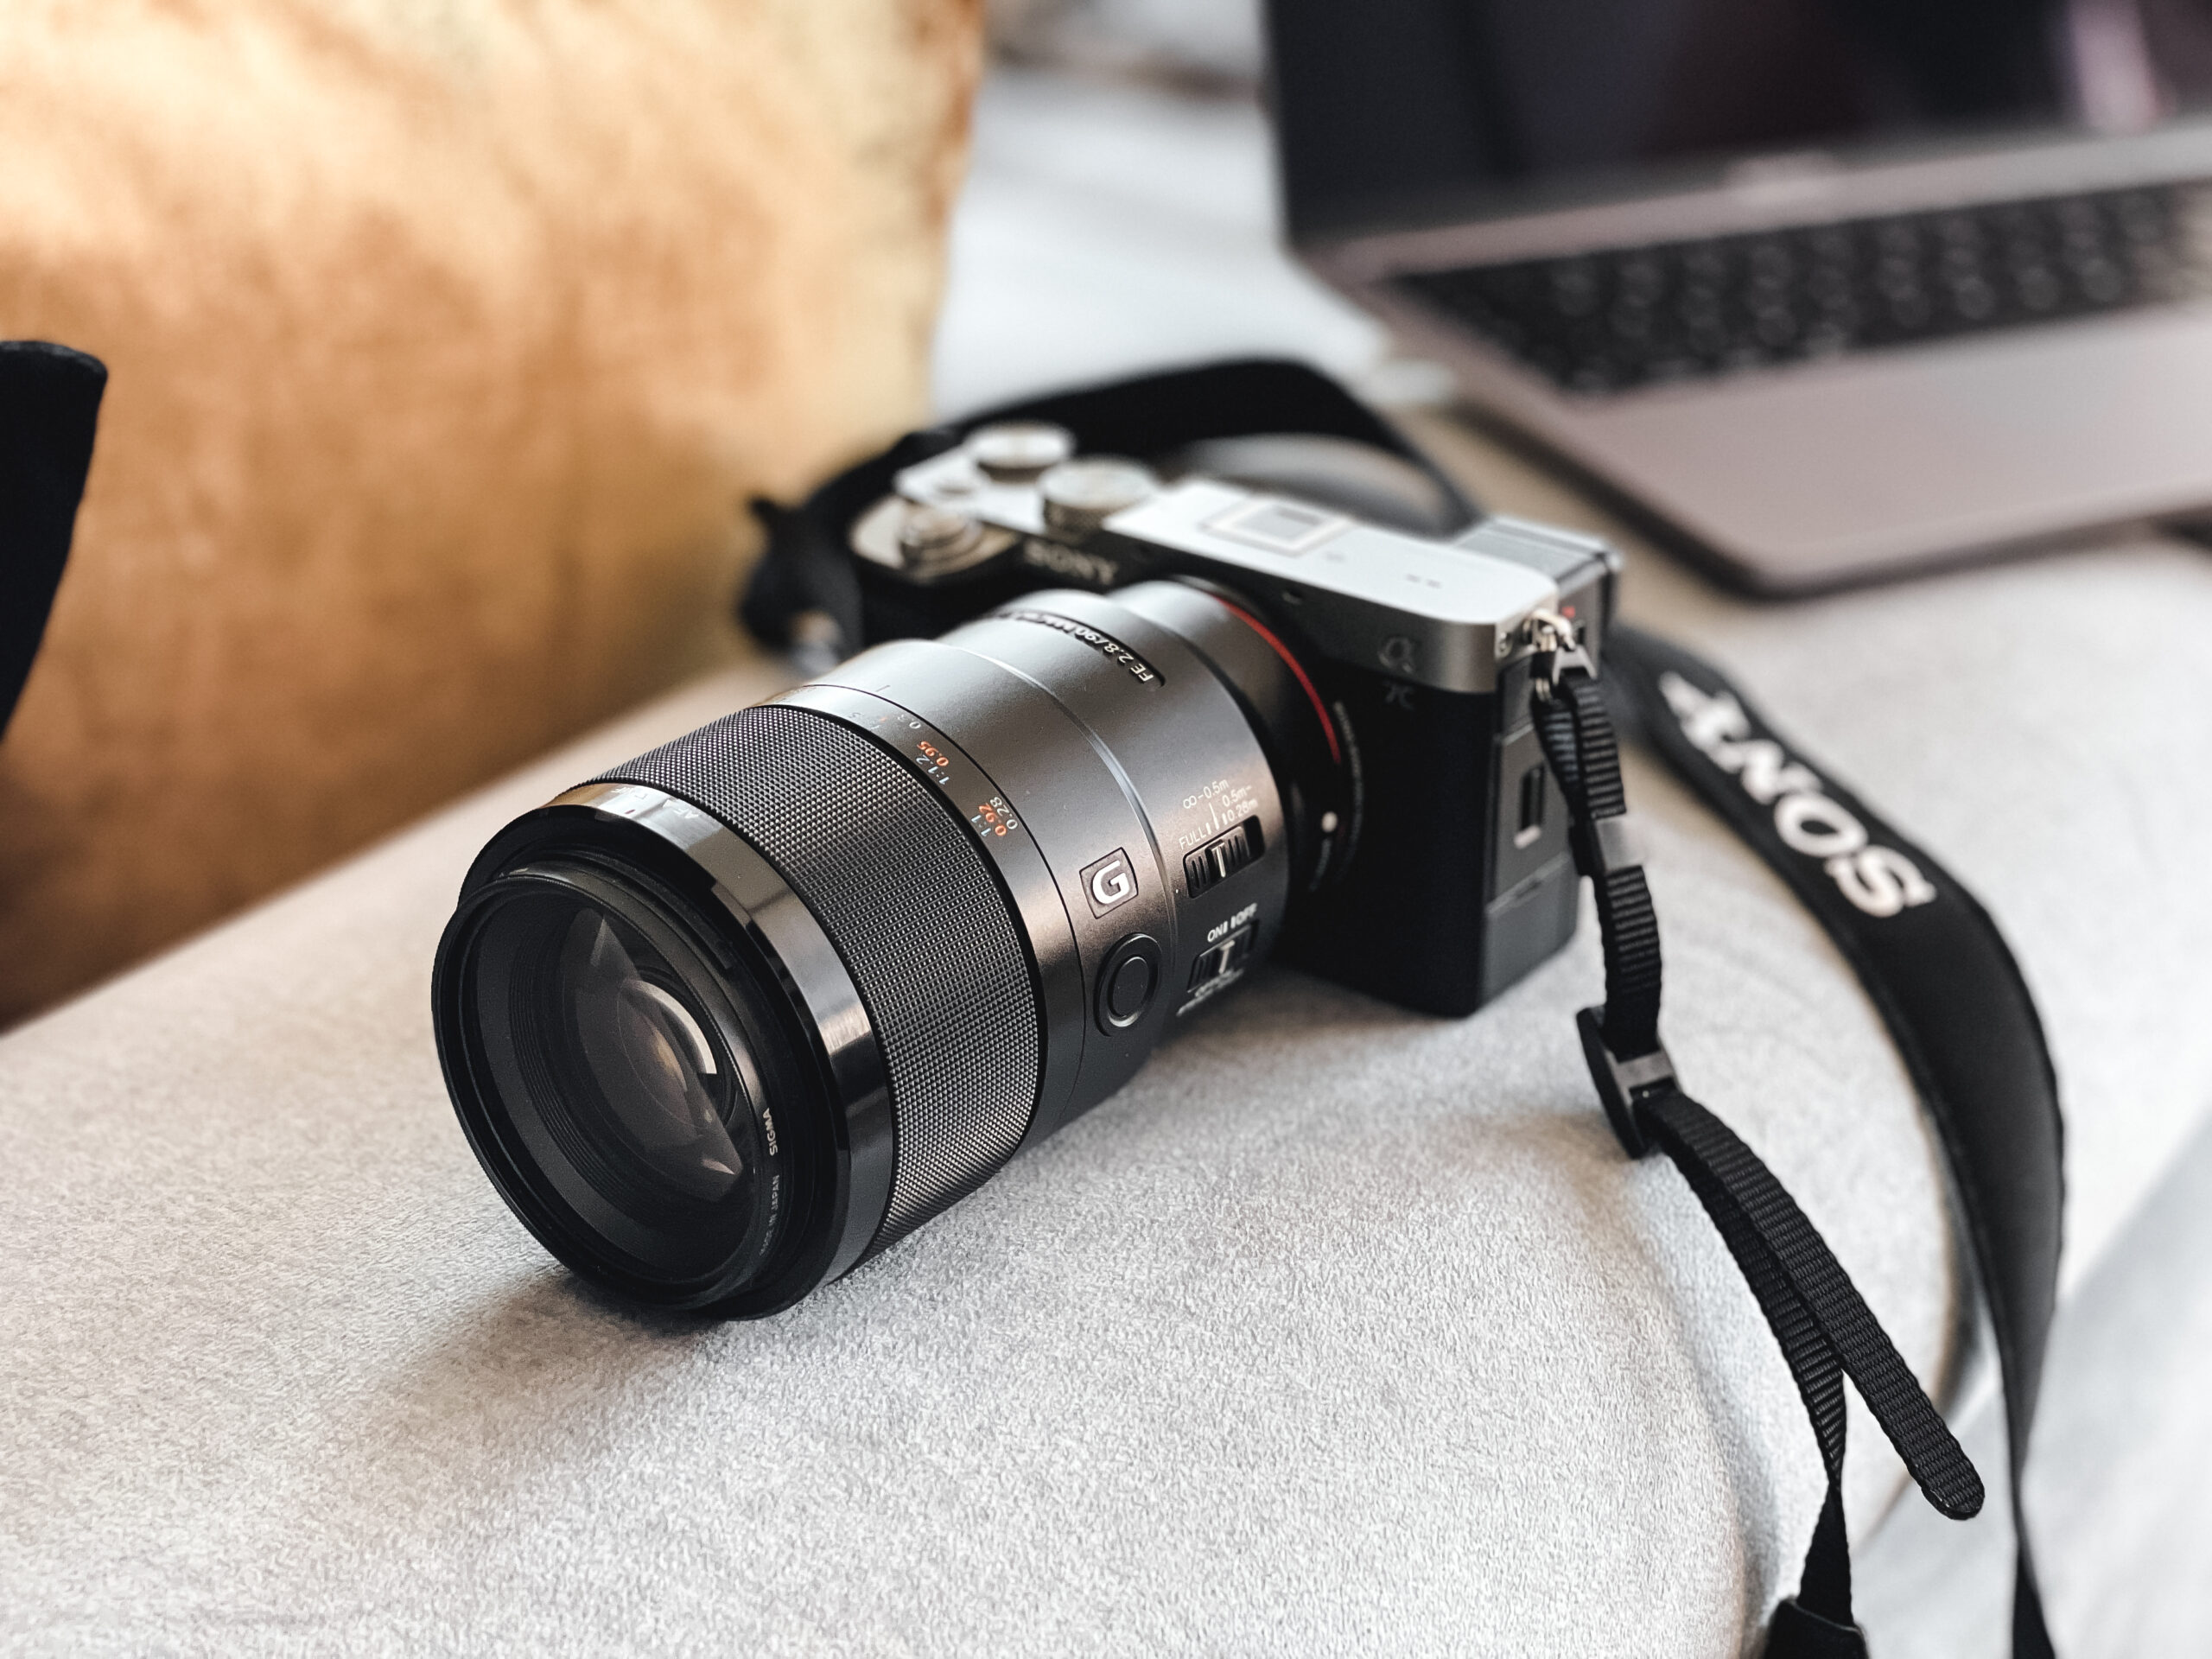
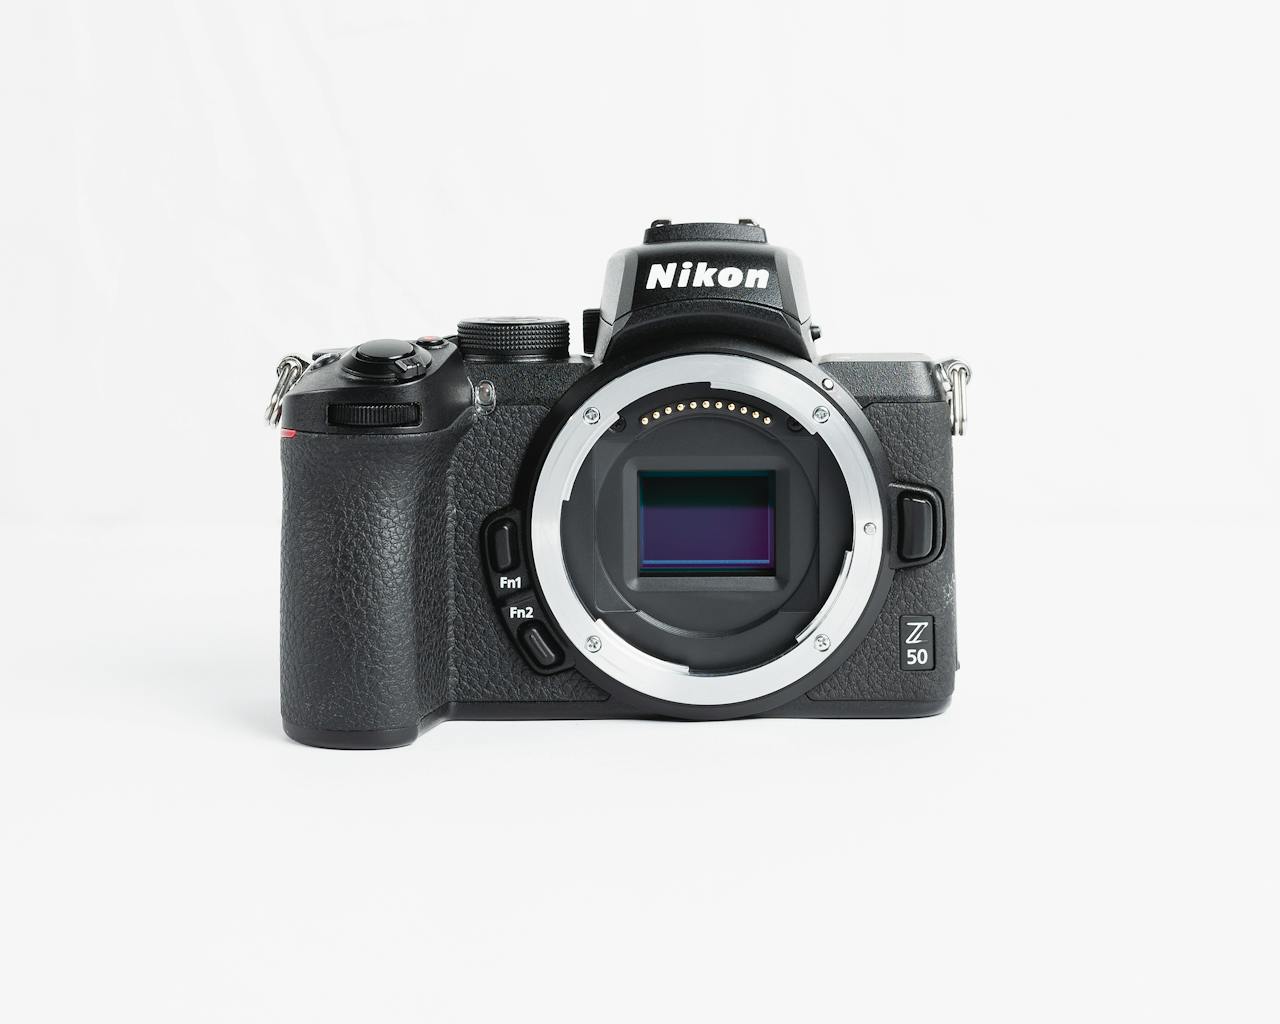 Mirrorless cameras are similar to DSLRs but use modern, lightweight designs without the bulky mirror system. They’ve become increasingly popular in astrophotography for their portability and advanced technology.
Benefits of Mirrorless Cameras:
Typically smaller and lighter than DSLRs.
Excellent low-light performance in many models.
Electronic viewfinders make it easier to frame faint stars.
Often offer faster shooting speeds and improved live-view focusing.
Best for: Wide-field and deep-sky imaging with portability in mind, and for photographers who want cutting-edge performance.
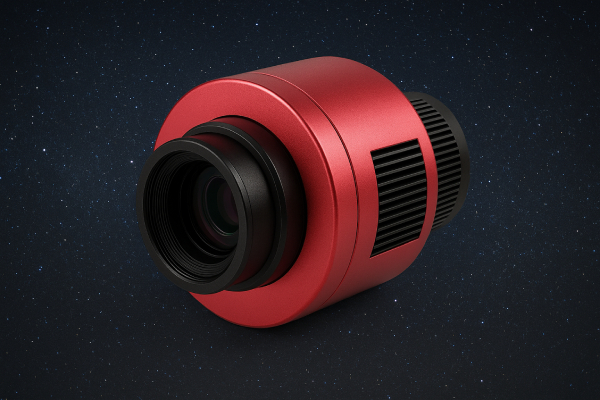
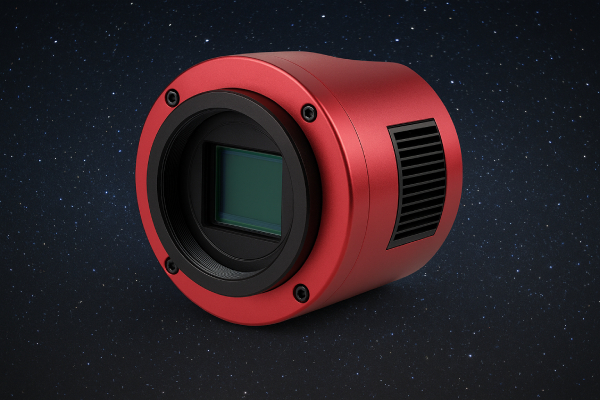 These specialist cameras are designed purely for astrophotography and connect directly to telescopes. They don’t have viewfinders or lenses like DSLRs but instead capture extremely detailed data from celestial objects.
Benefits of Astronomy Cameras:
High sensitivity to faint light, ideal for galaxies, nebulae, and star clusters.
Often cooled to reduce noise during long exposures.
Available in monochrome (for maximum detail with filters) or one-shot colour versions.
Optimised software support for stacking and image processing.
Best for: Advanced astrophotographers focused on deep-sky imaging and high-resolution data capture.
 Small, affordable cameras—often referred to as planetary webcams—are perfect for capturing fast, detailed images of planets, the Moon, and the Sun (with proper solar filters). They can also double as guiding cameras for long-exposure deep-sky imaging setups.
Benefits of Planetary Cameras:
High frame rates capture fleeting moments of good atmospheric clarity.
Compact and budget-friendly.
Great for planetary, lunar, and solar imaging.
Useful for auto-guiding systems in advanced setups.
Best for: Planetary and lunar photography, beginners experimenting with astrophotography, or as a supporting camera for guiding.
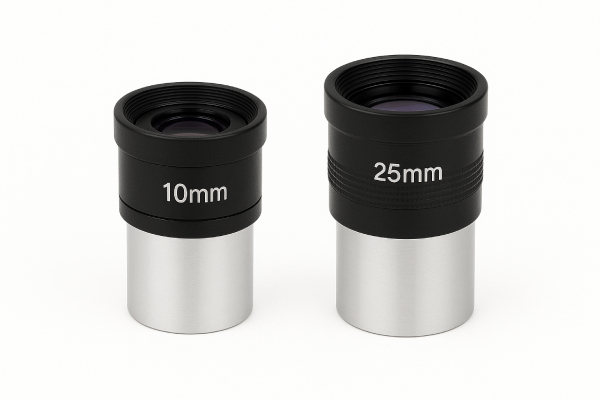
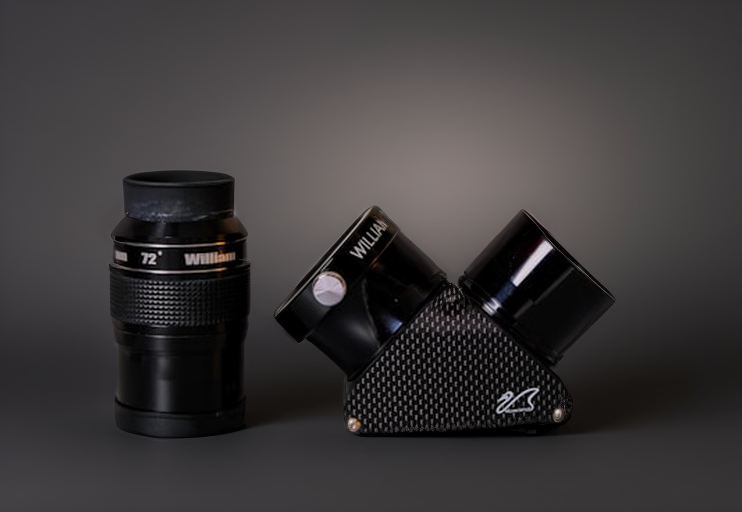
Eyepieces are essential accessories that dramatically affect what you see through a telescope. While the telescope itself gathers light, the eyepiece determines how that light is magnified and presented to your eye.
A Barlow lens multiplies the magnification of any eyepiece, giving you more flexibility without needing a large collection of lenses. Understanding how these tools work can help you get the most from your observing sessions.
Eyepieces come in many designs and focal lengths, and they are just as important as the telescope itself in shaping the quality of the view. The focal length of an eyepiece (measured in millimetres) determines the magnification when paired with your telescope.
Key Points About Eyepieces:
Magnification = Telescope focal length ÷ Eyepiece focal length.
Shorter focal length eyepieces (e.g. 5–10mm) provide high magnification, useful for planets and the Moon.
Longer focal length eyepieces (e.g. 20–40mm) give low magnification and wider fields of view, ideal for star clusters and galaxies.
Eyepieces also differ in apparent field of view (AFOV), which affects how wide the sky looks. Wide-angle eyepieces (e.g. 68°–82° AFOV) provide a more immersive view.
Comfort matters too—eyepieces with long eye relief are better for those who wear glasses.
Popular Eyepiece Types:
Plössl – Affordable, good quality, and widely used.
Wide-Angle (e.g. 68°) – Excellent for deep-sky viewing.
Ultra-Wide (82°–100°) – Immersive experience, though often more expensive.
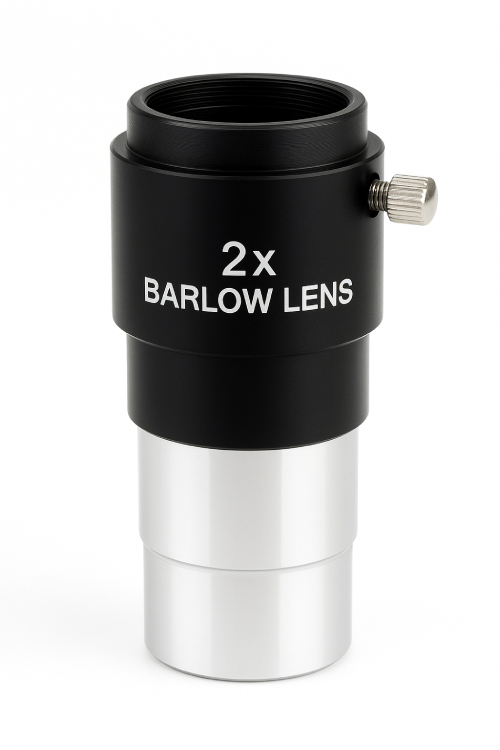 A Barlow lens is a secondary lens that sits between the telescope and the eyepiece. It increases the magnification of the eyepiece by a factor of 2x, 3x, or more, effectively doubling or tripling your eyepiece collection.
Benefits of Barlow Lenses:
Doubles or triples the magnification of your eyepieces without buying more lenses.
Preserves comfortable eye relief—useful with high magnification.
Cost-effective way to expand your range of magnifications.
For example:
A 25mm eyepiece normally gives 40x magnification in a telescope.
With a 2x Barlow, that same eyepiece gives 80x magnification.
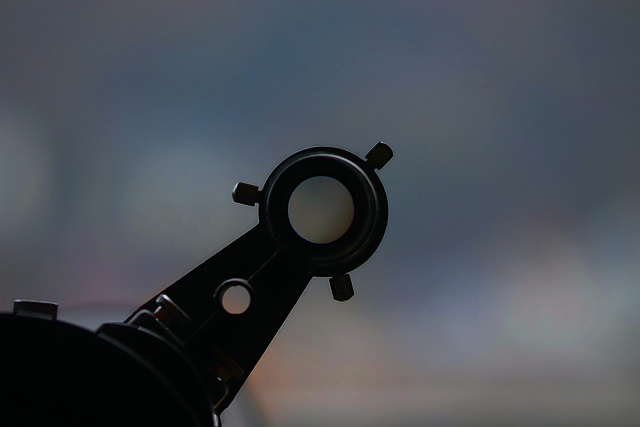
Optical Finderscopes
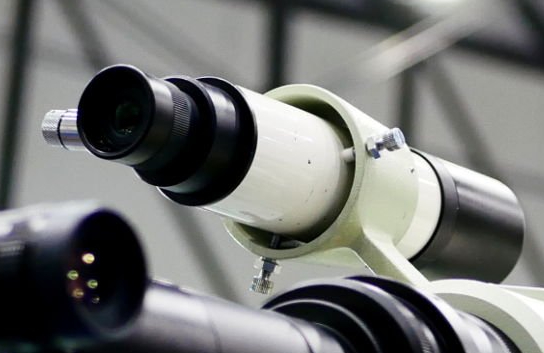 These are miniature refracting telescopes with lenses and sometimes crosshairs for alignment.
Straight-through optical finders: Work like a small telescope, usually in the 5×24 to 9×50 range (magnification × aperture in mm). They show an inverted or mirrored view, depending on the optics.
Right-angle optical finders: Equipped with a diagonal, they allow you to look from the side at a right angle, which is more comfortable when pointing high in the sky. Some have correct-image optics so the view matches the naked-eye sky orientation.
Red Dot Finders (Reflex Sights)
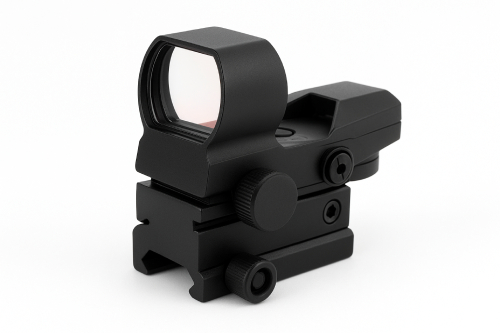 Instead of magnification, they project a red dot or reticle onto a transparent screen. You keep both eyes open and see the dot superimposed on the sky. They don’t enlarge objects, but they’re lightweight, intuitive, and excellent for beginners.
Reflex + Magnified Hybrid Finders
Some designs combine a red dot finder with a small optical scope. The red dot helps in rough positioning, and the optical finder provides a closer, aligned view for fine placement.Laser Finders
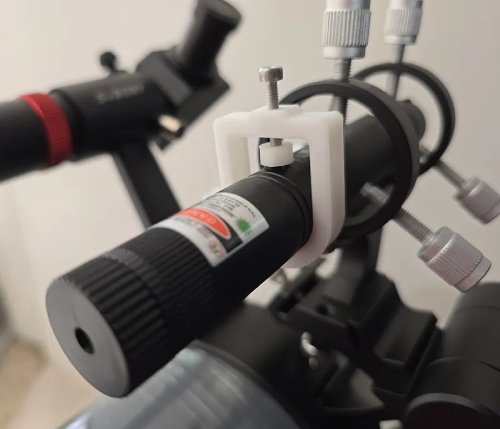 A green laser pointer is mounted on the telescope, projecting a visible beam into the sky. This makes it very intuitive—where the beam points, the telescope points. However, they require caution (never use near aircraft, people, or wildlife) and may be restricted in some locations. They also depend on clear, dark skies, as bright moonlight or heavy light pollution can wash out the beam.
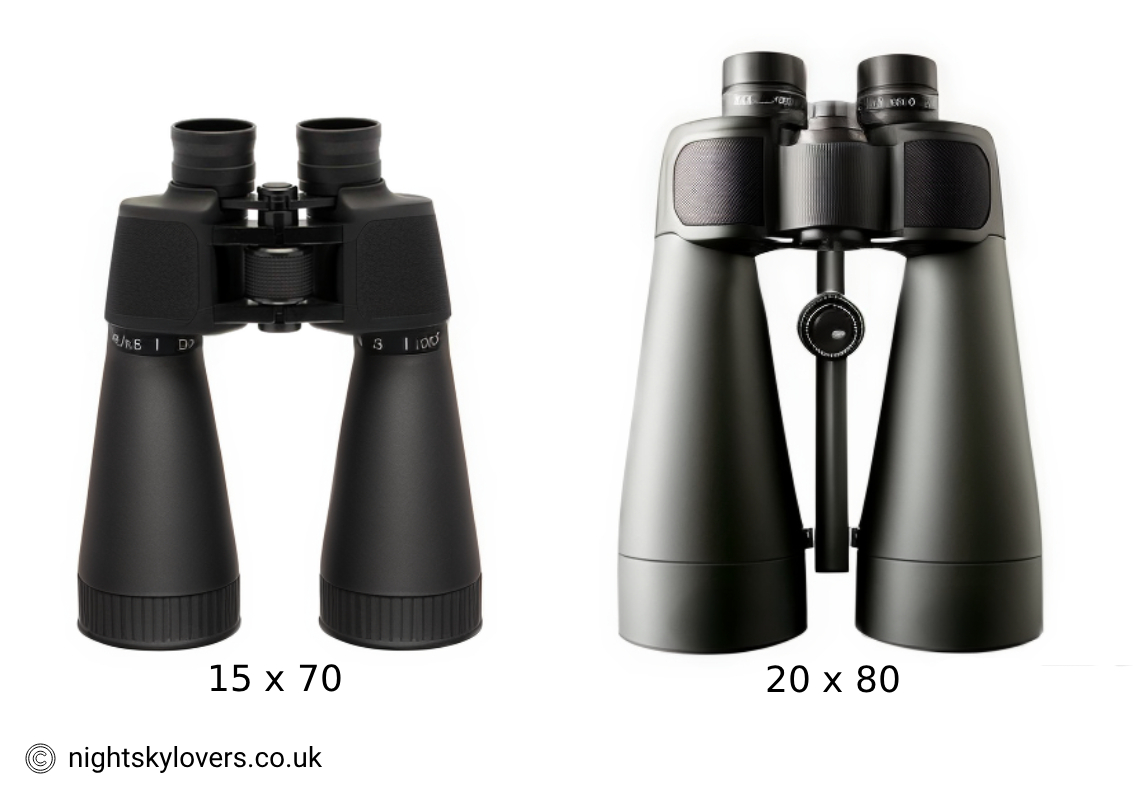
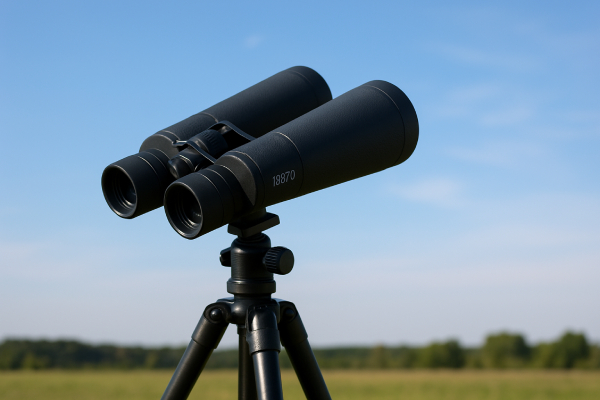 Tripods provide a stable platform for binoculars and many types of telescopes, making observations steadier and more comfortable. A good tripod reduces vibrations, allows for smoother tracking of objects, and helps maintain alignment when switching between different parts of the sky. They are particularly useful for binocular astronomy, since handholding binoculars often causes the view to shake. For smaller binoculars this can be tolerable, but with larger models (15×70 and above) the shake becomes more noticeable, making a tripod or support almost essential.
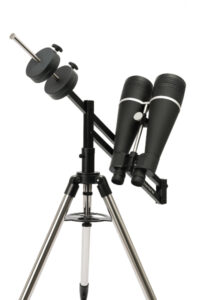
 For binoculars, some observers prefer reclining on a garden chair or even lying down, which steadies the arms and makes it easier to look up at the sky. A tripod provides excellent stability, but one limitation is that it can be awkward to aim binoculars straight overhead at the zenith, since the tripod legs and head can get in the way. To address this, alternatives such as parallelogram mounts or dedicated reclining mounts allow comfortable overhead viewing while still reducing shake.
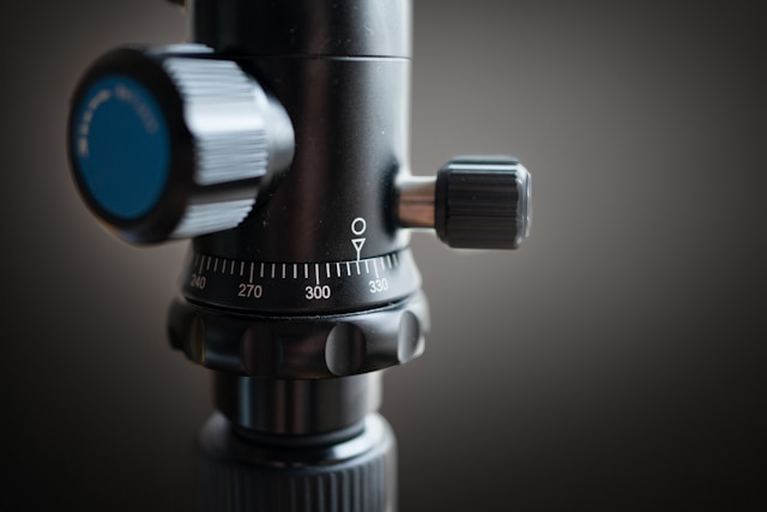
Tripods for telescopes often feature adjustable legs for height, and their heads may allow for fine motions in both altitude (up and down) and azimuth (left and right). Some are equipped with fluid or geared heads for precise movement, which is especially helpful when observing planets or tracking objects as they drift across the sky.
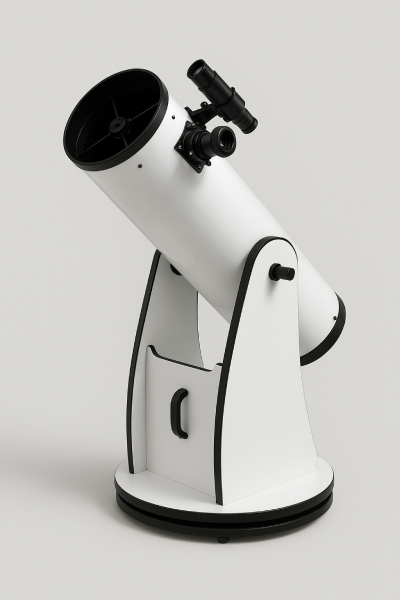
One key exception is the Dobsonian telescope, which comes with its own dedicated rocker-box mount. This design provides built-in stability and smooth manual movement without the complexity of a tripod. Unlike tripod-mounted telescopes, which can sometimes feel unsteady at higher magnifications or awkward when pointing high overhead, Dobsonians excel in stability and ease of motion, making them particularly well-suited for deep-sky observing.